
Flakpanther
- Tamas Seres
- Jan 24, 2024
- 3 min read
This time, it wasn't the original vehicle that inspired me, but another model. I saw this model on a website (karopka.ru) I liked it a lot.

I decided to investigate a bit whether such vehicle actually existed or if it was rather a 'paper tiger'. After a fairly short investigation I found out that at least in one case German soldiers indeed mounted a flak on a Bergepanther ausf D hull.

This photo was allegedly taken in Prague in May 1945. This was another push towards this build although I knew I wouldn't want to build this exact vehice. I quite liked the idea of having the classic dark yellow base colour on the Bergepanther, but keeping the anit-aircraft cannon dark grey/
I quickly found out that HobbyBoss is offering this kit.

From there, it wasn't a difficult task to convince myself to go for it... :)
The building work starts with the lower hull, running gear as usually most of the time. I have to admit, it is a really straight-forward build, excellent fit, no need for filling anywhere. I was so into the build that I even forgot to take photos during the inital steps.
The kit comes with PR grills for the engine deck which is more and more common these days.


The cannon is nicely detailed. The PE parts are a very nice touch and although they require a bit of sanding here at the points where they were connected to the sprue, it is not a big deal. Most recently, I had painfully bad experiences with some aftermarket PE stuff, but I will get back to that when I will write the build review of the T-90 MBT.
But back to the Flakpanther and its cannon. As I mentioned, it is really nicely detailed and I can't complain about the fit either.


The painting started with the red-oxide primer. I used my airbrush for priming as the canon is super-detailed and a standard rattlecan would have not worked well in this case. Instead, the properly mixed and diluted Tamiya acryllic paint provides much better control in such a situation.


At this stage I have oversprayed the model with AK's chipping fluid. This was designed to help creating realistic chipping effects by protecting this layer of paint when the modeller starts washing back the main colour and applies the chipping before the main colour fully dries. You can apply a toothbrush, a cocktail stick, or a harder brush. As always, be patient and don't soak the model, let the water dissolve the thin layer of main colour. Basically, it fulfils the role of the so-called 'hair-spray technique', that I myself have never tried.


As I quite like this outcome, I don't think I will try using a hairspray anytime soon. Further chipping can be added by a small piece of sponge and an appropriate brush. Varying the colours also helps making a more realistic model: in this case I also use Tamiya Dark Iron paint.
A few layers of gloss varnish came next. This helps with the decals and also with the oil washes. According to my experiences oils are running much nicer on a hard, glossy, super-smooth surface.
This was the time when the smaller details and the tools were painted,


After all this, the Flakpather got a few layers of matt varnish.

It was now time to weather the main gun too. Highly diluted oil paints were used as wash and a few different colours of pigment, such as gun metal, farm dark earth and medium rust were also applied.


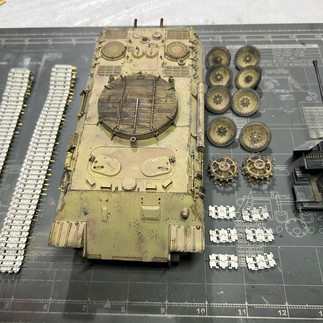
Now, only the tracks were left. I am a big fan of Friul tracks and I had a set of early Panther tracks that would perfectly fit on this ausf D hull. The kit comes with the later version and I should not complain as I am not building a concrete vehicle. It is entirely possible, that the tracks were changed in war time. Nevertheless, as I had it already this was the obvious choice.
They were burnished first, then got some wet pigments of various colours. The surface where the wheels are running on are usually clean and a bit shiny, so I used a graphite pencil to imitate this effect.
The wheels were also looked at again and got some extra chipping and dirt here and there.


They are pretty impressive in their final location, aren't they?


I was really-really happy with the complete model. Some may argue about the historic accuracy or see flaws and mistakes in the build, but I believe this is one of my best models I have ever completed. Here are a few pics of the final model, but as always, you can find more in the gallery.


Comments